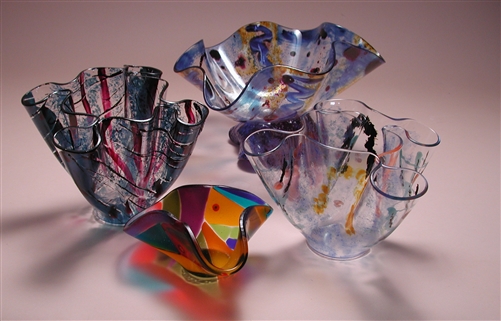
Glass slumping is an artistic technique that allows individuals to transform flat sheets of glass into beautiful, three-dimensional shapes. This process, which involves heating glass to a point where it becomes soft and pliable, opens up an endless array of creative possibilities. Whether you’re a seasoned glass artist or a beginner eager to try something new, this guide offers a comprehensive step-by-step tutorial to help you master the art of glass slumping.
Understanding Glass Slumping
The concept of glass slumping revolves around the behavior of glass as it heats up. When glass reaches a certain temperature, it becomes flexible enough to conform to the shape of a mold, resulting in elegant and unique designs. This method is particularly popular for creating bowls, plates, and other decorative items.
It’s crucial to choose the right type of glass for slumping. Most artists prefer using fusing glass due to its compatibility with the slumping process. Different glasses will have varying coefficients of expansion, which means they expand and contract at different rates when heated and cooled. For a successful outcome, ensure the glass and the mold are compatible.
Essential Materials and Tools
- Glass: Choose fusing glass for optimal results.
- Mold: Select a mold that complements your design vision.
- Kiln: A must-have for controlling the heating process.
- Kiln Wash: To prevent the glass from sticking to the mold.
- Cutting Tools: Essential for preparing the glass before slumping.
- Safety Gear: Gloves and goggles to ensure personal safety.
Step-by-Step Tutorial
Step 1: Prepare the Mold
Begin by applying a layer of kiln wash to your mold. This prevents the glass from adhering to the mold during the slumping process. Ensure an even coat to avoid any imperfections in the final piece.
Step 2: Cut the Glass
Using appropriate cutting tools, shape your glass to fit the mold. Precision is key, as any errors at this stage will affect the final product. For more refined techniques, explore advanced guides and tips.
Step 3: Load the Kiln
Place the prepared glass onto the mold, ensuring it is centrally positioned. Carefully transfer the setup into the kiln. It’s important to maintain a clean kiln environment to avoid contaminants affecting the glass.
Step 4: Firing the Kiln
The firing schedule is crucial. Gradually increase the temperature to allow the glass to slump over the mold, following a controlled program to prevent thermal shock. For detailed firing schedules, discover expert strategies here.
Step 5: Cooling Down
Once the slumping process is complete, allow the glass to cool slowly. This annealing phase is essential to ensure the glass remains strong and durable. Sudden temperature changes can lead to cracking or stress within the glass.
Tips for Successful Glass Slumping
- Experiment with different molds to explore various shapes and designs.
- Maintain a clean workspace to avoid unwanted particles embedding in the glass.
- Keep a detailed record of firing schedules for future reference and improvements.
- Regularly check kiln elements and equipment for optimal performance.
For more insights and personalized advice, learn about our tailored solutions.
Conclusion
Glass slumping offers a rewarding experience for those willing to delve into the art of glasswork. With the right tools, materials, and guidance, artists can create stunning pieces that reflect their creativity and craftsmanship. Whether you’re looking to enhance your skills or begin a new hobby, the journey into glass slumping is sure to be an inspiring one. To further refine your techniques, find out more about this approach and elevate your art to new heights.
About the Author


